


This is an extra special recipe…specifically crafted for a small select group of readers who were more than a little disturbed by my earlier post, Roasted Heart of My Enemies. While the majority of you dear mortals were fine with what I wrote, a few of you were less than enthused. The day after I posted, I was awoken by a handful of angry messages dinging on my phone.
Some of you were absolutely aghast that I would dare to show you how to make a real heart and demanded I fix this situation by showing you something that just looks like a real heart, because (and I quote) “Eww. This is horrifying. What is wrong with you?!”
Seriously, guys…I mean…seriously?
Of course, to be totally honest, I take your revulsion as a compliment (just means I’m doing my job)…but then again, I need readers, so…
Aww hell. Damned if I do. Damned if I don’t.
Fine.
Don’t say I’m not accommodating.
Grr.
So, without further ado…
Red Velvet Bleeding Heart Cupcakes
For the cupcakes you will need:
- 1 box red velvet cake mix of your choice
- Eggs
- 1 egg yolk
- Cooking oil (Vegetable or Olive, doesn’t matter)
- Heavy cream
- 2 Tablespoons cocoa powder
Because each box mix is slightly different, I have not put down exact measurements required for your ingredients above with the exception of the egg yolk and cocoa powder. Make your cake mix per the instructions on the box, but substitute the heavy cream for water (at a 1:1 ratio) and add in one additional egg YOLK to your mix.
The cocoa powder is purely optional. I’m just personally not a fan of red velvet unless I add in extra chocolate. It also darkens the color of the final cupcake down a bit, giving it a deeper red color.
The above substitutions will help ensure that your cupcakes are richer and denser than the average cupcake and the added structural integrity will mean they will hold up to you manhandling them later on as you apply the fondant.
With the exception of these substitutions, mix up your box mix exactly as directed.
Once your cupcakes are mixed up, fill your muffin tin and bake per the directions.
You are going to want to try and make at least 16 cupcakes with this mix.
While they are baking, it’s time to make the frosting.
For the frosting you will need:
- 1 can pre-made cream cheese frosting
- Red food coloring
- Black food coloring
- Blue food coloring
Scoop your frosting into a microwave safe bowl and pre-soften it by microwaving at half power for 30 seconds.
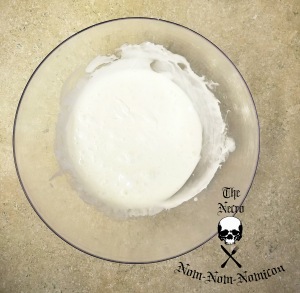
Once your frosting has achieved a liquid state, mix in your red food coloring. You’re going to want a deep rich, blood red color, so add as much as you need to achieve that goal. You can also add in a drop or two of both black and blue to give the frosting more depth to the color.
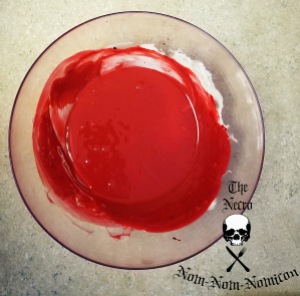
Once you have a color you are happy with, set it aside for the time being. It’s time to work on the fondant.
For the fondant you will need:
- 2 Cups powdered (confectioners’) sugar
- 1 Tablespoon lemon juice
- 1 3/4 Cups miniature marshmallows
- 1/3 Cup white candy melts
- Brown gel food color
- Red gel food color
In a microwave safe bowl, melt your marshmallows and lemon juice together, cooking them in 15 second bursts and stirring between each cooking.
When they are smooth and melted, add in your candy melts. Continue to cook in the microwave in 15 second bursts until all the candy melts are melted and mixed in.
At this point, add in your gel food coloring, adjusting your brown and red until you achieve a flesh tone you are happy with.
Slowly pour the liquid candy into your powdered sugar, mixing as you go until you achieve a thick, dough like paste. When you are unable to stir the mixture any longer using a wooden spoon, turn out onto a surface liberally dusted with powdered sugar and knead until smooth and pliable.
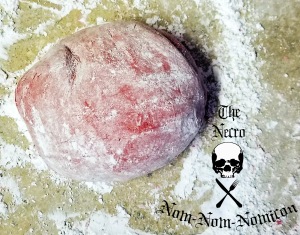
Don’t worry that your fondant looks “dusty” at this point with all the powdered sugar on it. We’ll be cleaning that off later and for now you need it to be “dusty” so it won’t stick to everything.
Divide your fondant into 16 equal sections. I find it’s easiest to do this by first dividing it in half, and then dividing each half into 8 pieces.

Hopefully by now your cupcakes are out of the oven and cooled. Using a knife, trim off the “flare” of muffin top around the edge. You want a fairly uniform “column” of cupcake, not a “mushroom.”
One at a time, dip the trimmed cupcakes into your melted and dyed frosting. If your frosting is too thick, feel free to zap it in the microwave for an additional 30 seconds. The object here is to simply get a coat of frosting on your cake so the fondant will stick…nobody is judging you on how pretty the frosting job looks so don’t worry if it’s sloppy or drippy.
After you’ve dipped your cupcakes, pop them into the freezer to firm up for about 15 to 30 minutes. 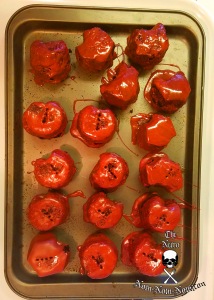
Once your cupcakes are nice and firm, it’s time to start wrapping them in fondant.
One at a time, take your fondant chunks that we divided up earlier and roll them out into a loose circular shape, roughly 6 to 8 inches in diameter.
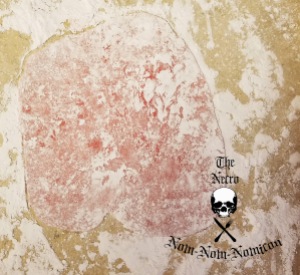
Place one cupcake in the center of your fondant circle.
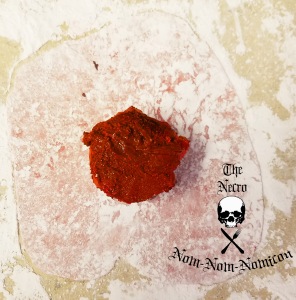
Gently fold your fondant up over the top of your cupcake. Using a dab of water, wet the edge of the fondant that covers the cupcake (as you do this, be careful how much water you use. Your fondant is essentially just a ton of powdered sugar so too much and it’ll dissolve. You just need enough water to get the fondant damp and sticky enough to stick to itself.
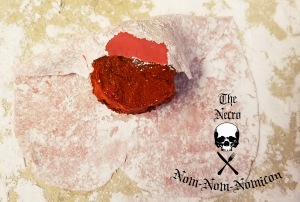
Fold up the other side of your fondant, sealing your cupcake into a fondant “tube.”
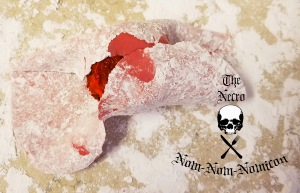
Now, using your fingers and little dabs of water as glue to stick your fondant together to itself, carefully fold up the two long sides and create “tubes” out of them on either side of your center cupcake.

Once you get all your cupcakes wrapped up, it’s time to prep the “blood wash.”
For this you will need:
- 1/4 Cup chocolate syrup
- 1 Teaspoon red food coloring
- 1/4 Cup corn syrup
Mix all three ingredients together until you achieve a blood like color and texture.
Place your hearts onto a serving platter or plate. Using a paintbrush, gently paint your blood onto your hearts, paying careful attention to the folds and seams as well as the tops of the ventricles. Drip a little extra blood around the base of your heart for color and appeal.

Now all that’s left is to dig in and enjoy the fruits of your labor!


Mmmm…

So delicious…

Good thing we made 16!
They’re so delicious even zombies enjoy them!

Bone appetite!
This recipe was inspired by the amazingly talented Ever So Juliet who was in turn inspired by the equally talented Lily Vanilli but adapted independently for this blog by yours truly. The zombie was courtesy of Z Nation on Syfy. An all new season 3 starts this September!
Feel free to swing by my blog, the Necro Nom-nom-nomicon for even more dark recipes or follow me on Twitter at @Tye_Rannosaurus. You can also check out my Facebook page.